
Story and Photos by Courtney Warren
I’ve never been super interested in being exactly like other people. I mean, don’t get me wrong… growing up I didn’t want to look totally different than anybody else. (When everyone got a Liz Claiborne purse in 8th grade, I wanted one too. But I always knew I had a little colorful spunk in me that khaki pants and button up shirts couldn’t contain.)
That’s really the way I approach my design as well. I can do designs that we see on Pinterest and they look beautiful. But my REAL joy is working with clients that want something a little bit different than everyone else. THEY want to be the pin on Pinterest that is setting the stage for other trends. It could be through a use of color, graphics like dots and stripes, or pairing metallic tones. When I have a client that really lets me use my creativity, it never fails that I love the end result. Being creative and out of the ordinary gets me really excited.
So, it’s no surprise now that fall has arrived, I am leaving traditional fall colors behind- gold, red and brown- and having a little pumpkin fun.
Plug in your glue gun and get ready to ruin your manicure- it is DIY time!
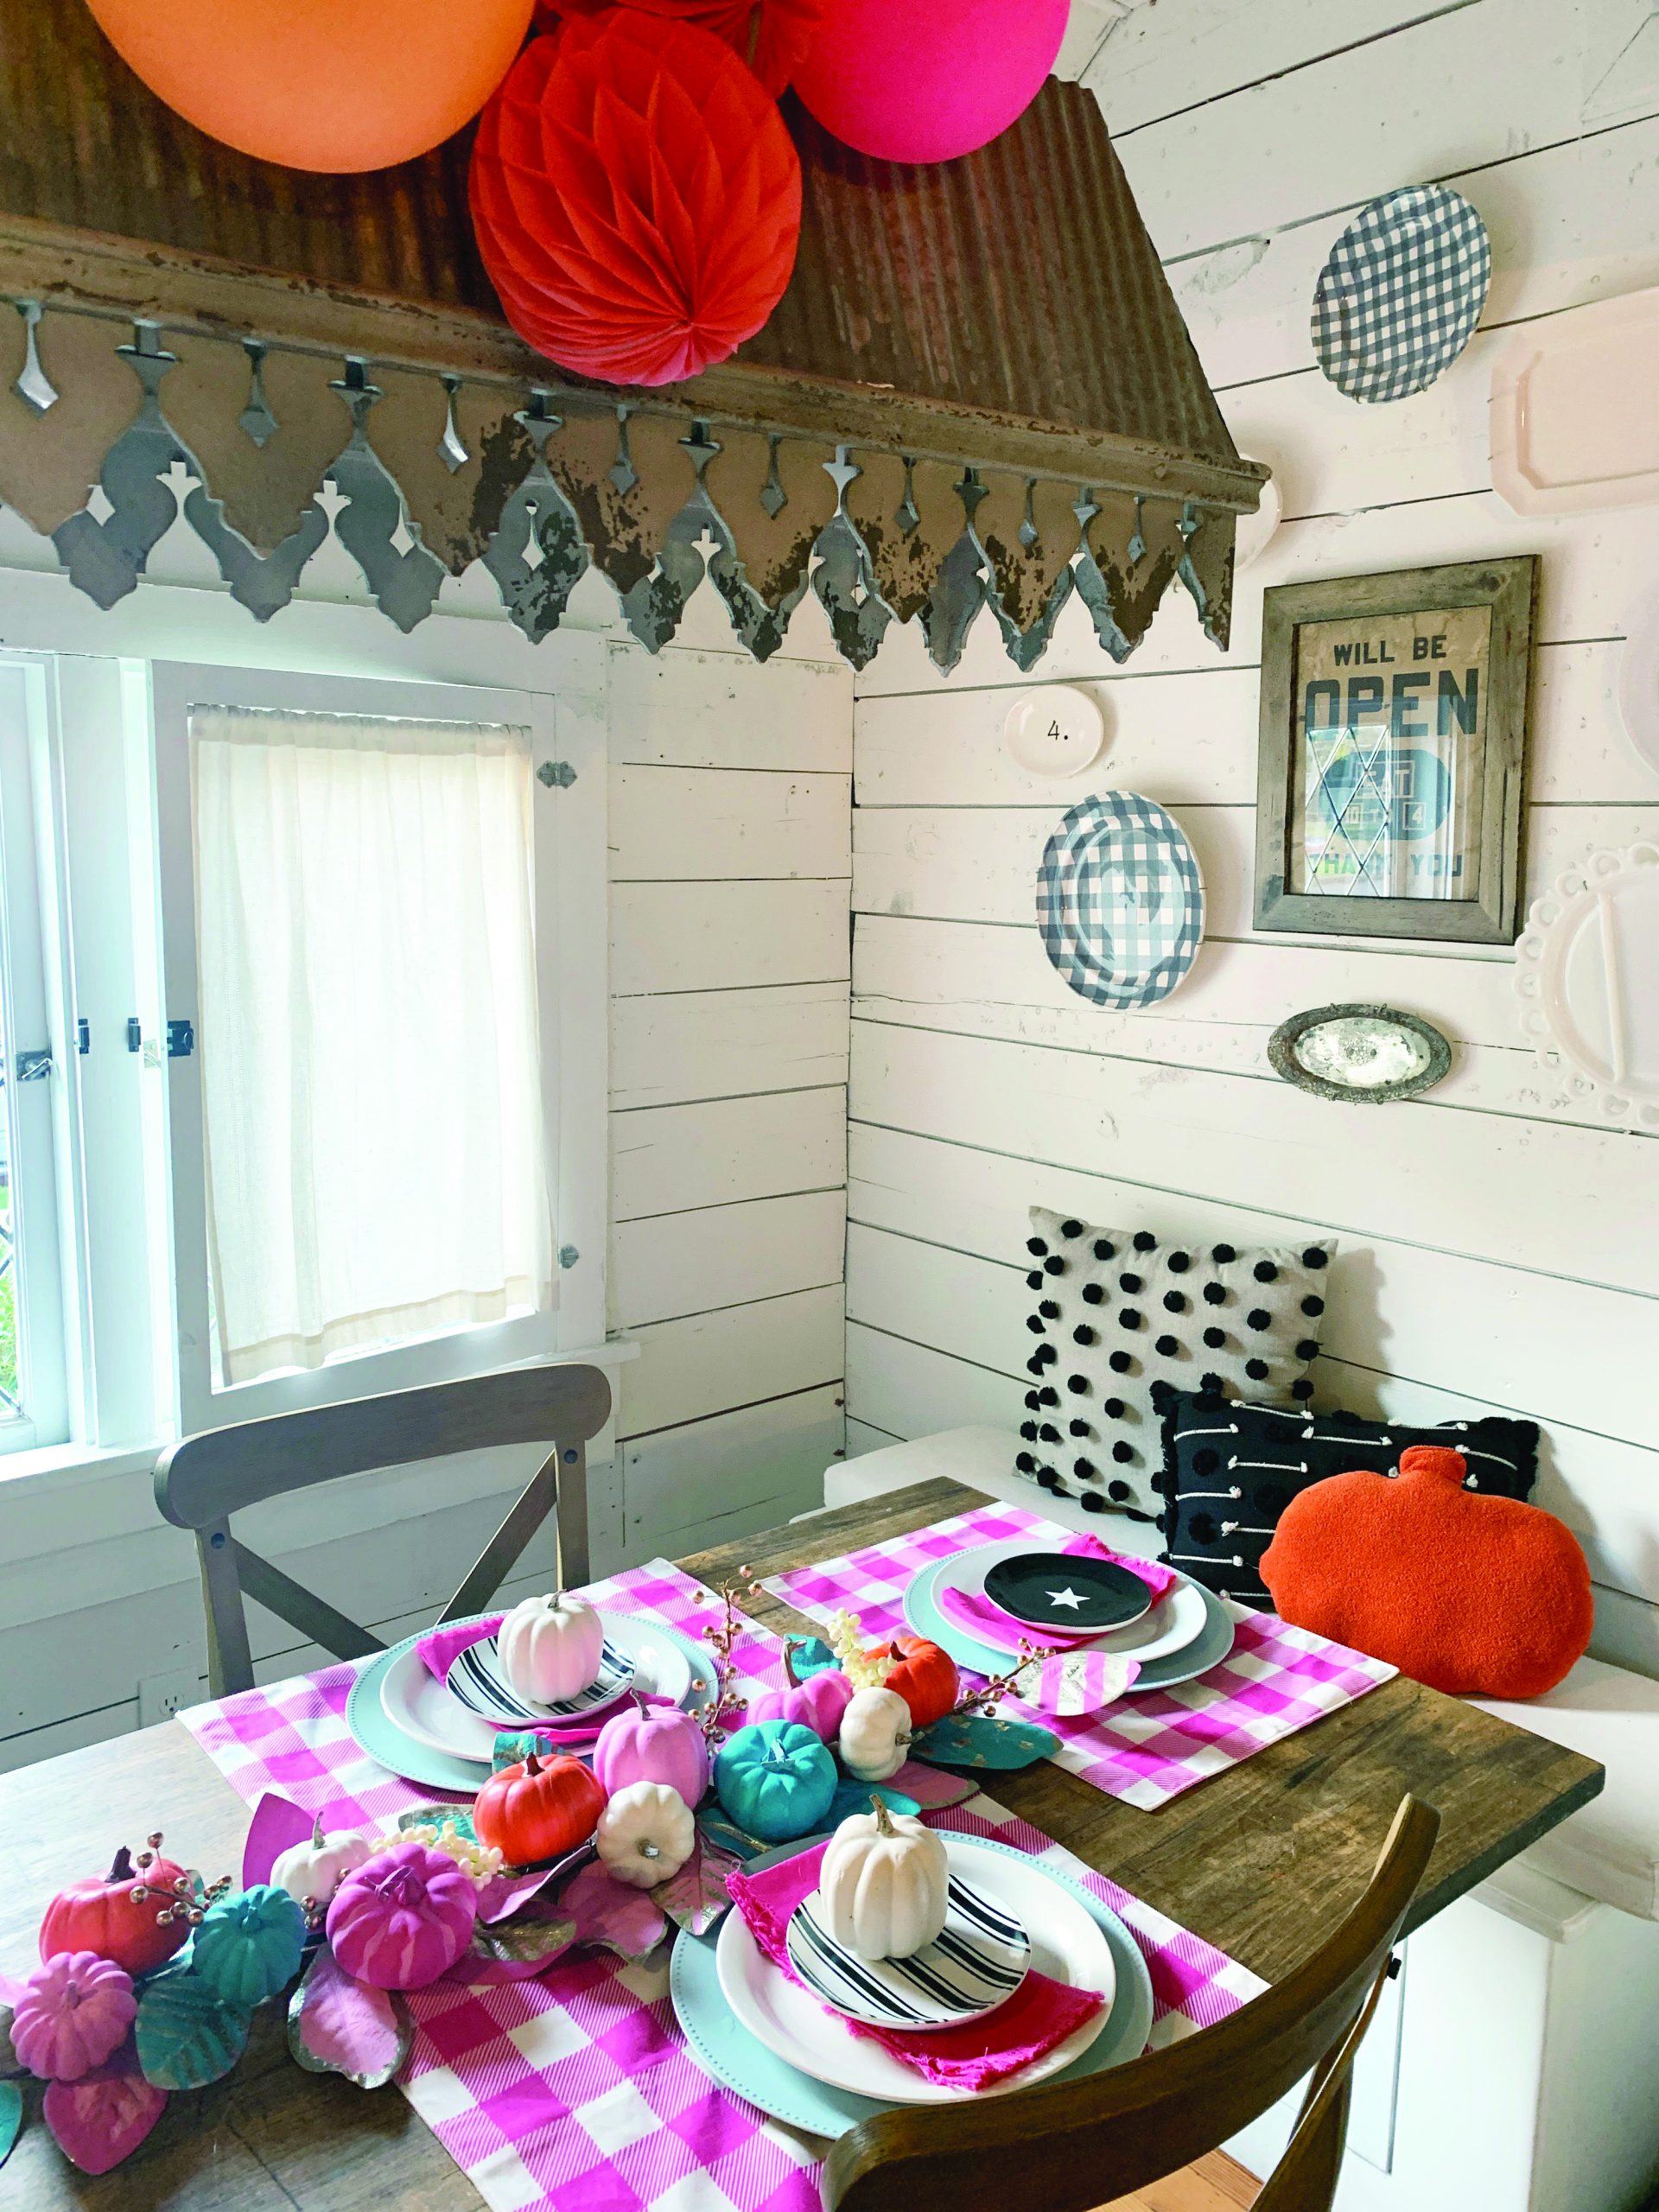
Real Life Design Tip: I chose my colors carefully. I knew I wanted an expected take on pairing with orange. Since most pairings are dark like fall foliage…(mustard yellow and brown and red), I kept going back to the unexpected combination of punchy turquoise with orange. I found a couple of color palette samples on Pinterest and finally decided on turquoise, orange, fuchsia and light pink.
When I shopped for the colors, I held the bottles next to each other to envision what the painted pumpkins would look like next to each other on the garland. Especially with the two pinks, I wanted to make sure the shades were exactly like I envisioned- not too similar to each other, or it would lose the impact of using two pinks.
Next, enlist your helpers to paint the pumpkins–or enjoy a blissfully quiet hour on this project while the gang is gone! I even enlisted merry helpers.
 Easy Life Hack: An easy way to paint the pumpkins without smearing them (getting paint all over your fingers) is to insert the wire into the top of an inverted plastic cup. Paint some of them light pink, some hot pink, some blue. Leave some white or orange, depending on the color of the pumpkins you started with.
Next, deconstruct your leaf stems, leaving a leaf of two on the end of each stem. Paint all leaves gold if they’re not already metallic.
Now, here’s a chance to exercise your creative gifts: outline some leaves in pink or blue. Paint pink or blue veins on others. Or paint only the center a color. Most of the leaves will have some gold showing. I did stripes, solid, and outlines to make bold statement leaves. This step let me channel the forgotten Disney cartoon Pocahontas and “paint with all the colors of the wind”. I let the leaves and pumpkins dry for about 30 minutes and did a 2nd coat so they would look brighter. This second coat was key in making them pop
Then, reconstruct the stems by turning them end to end and taping the colorful leaves back to the stem, staggering them as you go and leaving space between. Tape several stems together to create a garland.
Next is the part I had to play around with. I started taping the leaves with floral tape but the tape wasn’t secure enough to hold it as tightly as I wanted.
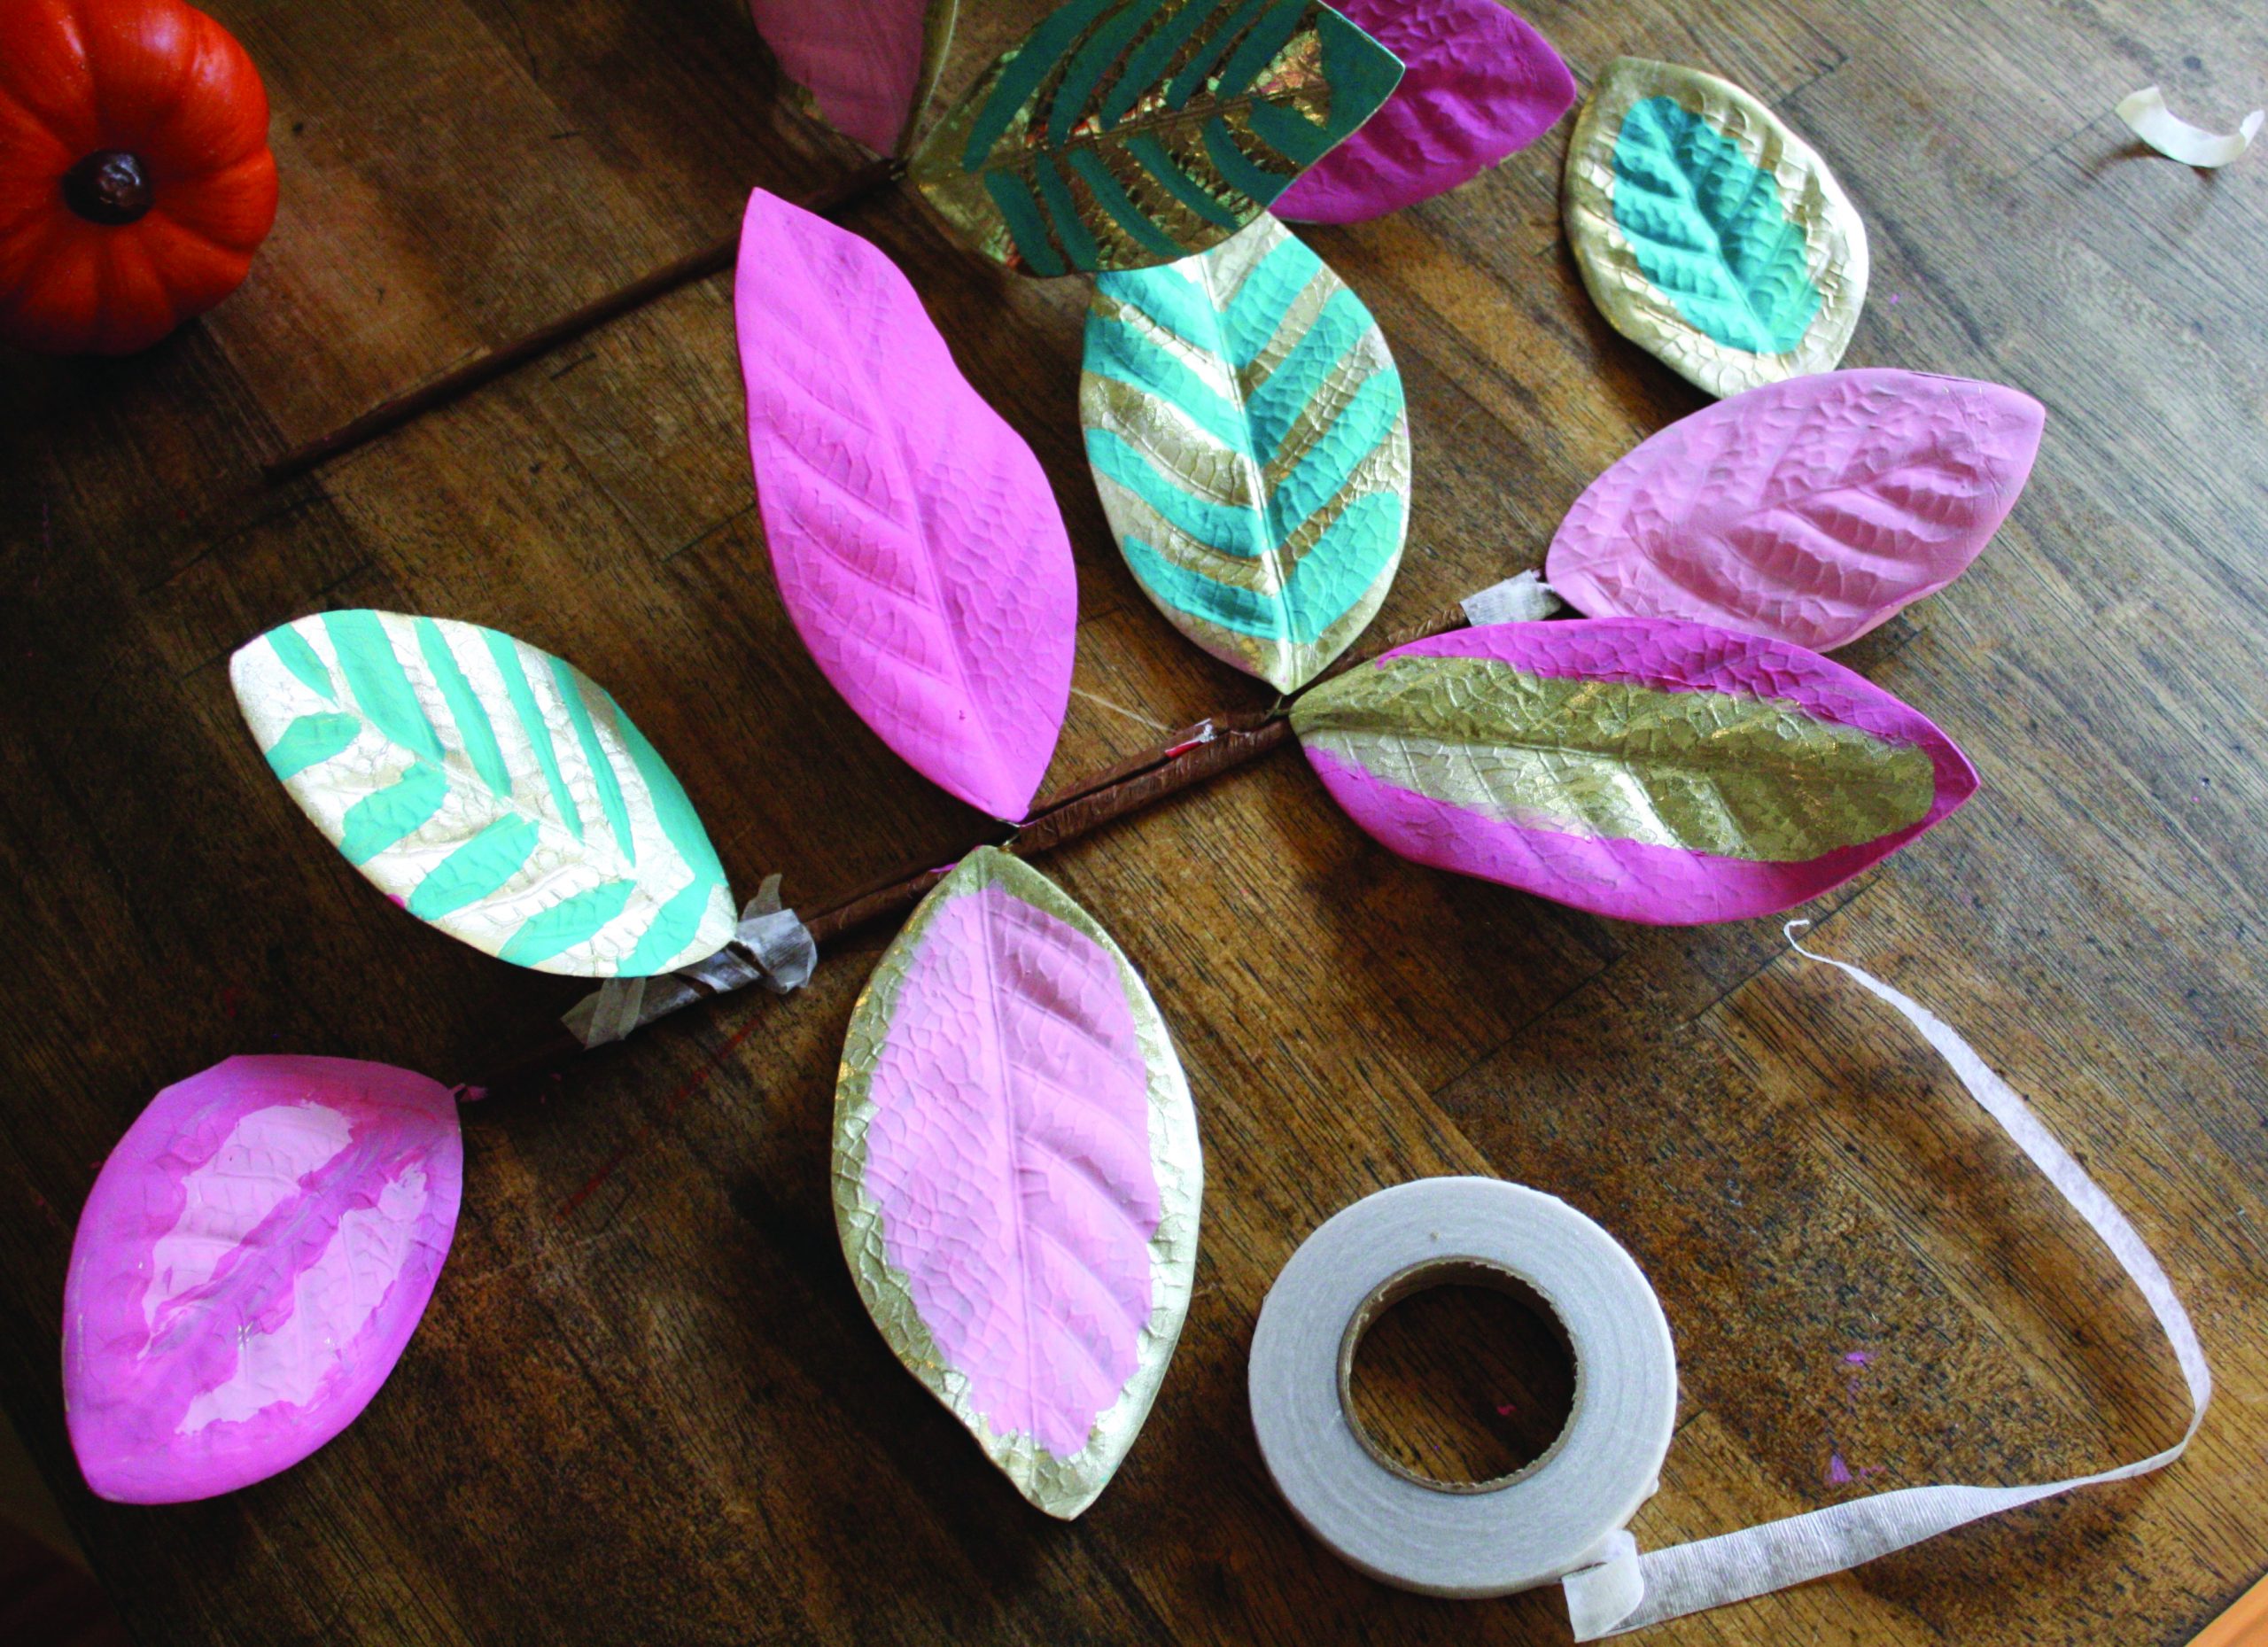 I switched to floral wire and hot-glue, but next time I think zip ties would be most effective.
DIY note: It is not a true DIY if you didn’t learn a lesson and need something you didn’t have at home!
Now add in your colorful pumpkins at intervals. If your pumpkins are on a wire, snip most of the length and twist the remaining bit around the garland and fasten with florist tape. No wire? Just hot glue the pumpkins among the leaves. Vary the colors and sizes, and don’t skimp. Nestle a good number of pumpkins along the garland. Lastly, tuck in some gold and white berry clusters here and there. Use florist tape or hot glue to secure.
Wow! Stand back and admire your work! Look in your spring table linens to see what placemats and napkins you might use with this exuberant fall tablescape. But because this is such a rich color palette, I didn’t’ want it to get too sweet. I cut some of the bright sweetness of the color by using simple white and black plates.
Plan a special meal to enjoy–and show off–the fruits of your labor.
In the end, I am so glad I took a departure from my typical fall decor. My breakfast table looks like a pumpkin dance party that I am invited to every morning! (Just don’t start the techno beats until I have had my coffee first.)

Gather your supplies. You will need:
- Mini pumpkins, any color (the kind on a wire are easy to hold for painting)
- Several stems of large almond-shape leaves
- Small picks of gold and white berries
- Some light pink, hot pink, white, orange, and Caribbean blue acrylic craft paint
- Medium craft brushes
- A roll of florist tape
- Hot glue gun and glue, if needed